Lightroom Love

  • Home
  • Presets
  • Get Help
  • Contact

Setting Up Lightroom for Best Performance

June 17, 2013 by Andrew Leave a Comment

As we dive into our year of learning Lightroom, we’ll get started today with the most important part: installing and setting up Lightroom! Think of this as a quickstart guide, although I’ll also be sharing some “ideal” setup information that you may not be ready to use.

Today, I want to share an email I recently got from a photographer I work with

 I’ve been working on perfecting my workflow and designing how I want everything setup.  Everytime I start to make progress, I run out of space on my hard drive, or can’t figure out how to split it up. Should I add an external drive? An internal drive! Help!

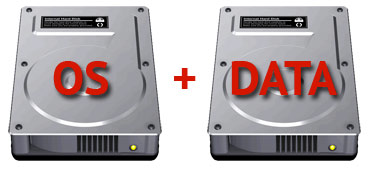
For me, I think a “media” drive is a great idea. I like keeping my OS on one drive, and everything else on another data.That keeps data separate, easier to manage, and safer in my opinion.

If you can make it possible, I think two drives is the way to go. As best you can, keep a drive with your OS and applications, and a separate drive just for your files like photos and Lightroom catalogs. The nice thing is that you can easily add a second drive externally, with a simple USB cable.

Choosing an external drive can be a little tricky because there are so many choices. Typically, the big decision is if you want to go USB or Firewire. These are two ports that are likely on your computer. Personally, I encourage people to stick with USB just because you’re guaranteed to have the port on your computer.

I use a MacBook Pro laptop, and my data setup is pretty simple: on the internal drive, I keep the Mac OS and Lightroom and all other applications. At my house, I store all of my shoots, Lightroom catalogs, and anything long-term on the external drive.

If you’re using a desktop computer, you can go one of two ways: install another drive inside the computer, or add an external drive.  If you’re using a laptop, the easiest way to go about it is definitely adding on an external drive. In either case, taking an external drive out of the box and plugging it in is far easier than an internal installation. If you’re tech savvy, you can save some money by buying an internal drive, but it’s not always recommended.

When it comes to external storage, you have to keep a few things in mind. Honestly, it requires being a little more careful than internal drives. It’s easy to trip over a cord and knock the external drive off of a desk. They’re also easier to forget at home and require something extra to carry. Still, I believe that keeping your photos and Lightroom catalogs on a drive separate from your everyday working files is a great idea.

How do you setup your data storage? Everyone seems to like something different – check in with a comment to let me know what you think.
Filed Under: Workflow Tagged With: finished

How many catalogs should I use in Lightroom?

March 15, 2013 by Andrew Leave a Comment

As we already know, Catalogs are the basis of all we do in Lightroom; it stores all of our data and editing information. A reader recently wrote in to me with a question about how best to manage her catalogs. Here’s what she asked:

How many catalogs do I need to use? Should I use catalogs for each of my shoots, or one catalog with all of my photos in it?? Help me Lightroom Love!

 -Sincerely, Caught up in Catalogs

No fear, distressed reader. The truth is that this is a dilemma that many Lightroom users – myself included – face. Unfortunately, I’m not sure that there’s an easy answer for the problem at hand. The best thing we can do here is to look at the two approaches, and let you decide how you want to use catalogs.

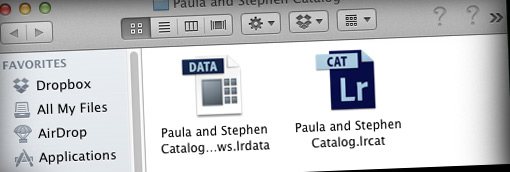
Lightroom catalog folder

Lightroom catalogs are at the core of the program – should we use one or tons?

One Catalog

Using one big catalog with all of your images is really powerful. See, Lightroom has tons of features built into it that help us sort, categorize, view, and edit. The fact that we could do this with thousands and thousands of images is where the power of Lightroom really starts to shine.

Once we’ve added keywords, labels, flags, stars and more, we can really see the power of Lightroom. No matter how many images we add in, I still find it easy to get to the photos I need in just a few seconds when you’ve spent time tagging your images.

Using one catalog certainly is advantageous in some senses. Everything is at your fingertips, and Lightroom really makes it easy to get to what you need.

Multiple Catalogs

Using multiple catalogs is a huge mental aid to me. I have a terrible (yet sometimes good) habit of jumping around between photo projects. I suffer from information overload – if I see other photos to work with, I’ll be tempted to get away from the task at hand. Implementing controls against this are really important in my workflow.

Using multiple catalogs is a good way to help me stay focused and work on one project at a time.

Data feels safer to me in multiple catalogs. Data segregation is a really important internal control in my workflow as well. If I had one accidentally get deleted (and my backup was toast) then that’s tough. But if everything I’ve ever done is in a single catalog, then I’m going to really suffer a loss. And although Adobe constantly improves catalog performance, I still think smaller catalogs are inclined to work more quickly than massive ones.

A Happy Marriage

There’s no rule that says that we have to exclusively choose one system to use. I probably lean more toward the “multiple catalogs” approach, but there are a few consolidated catalogs that are important to my workflow.

Let’s take the way I shoot weddings for example. I might have 1500 – 2000 images to work with from any given wedding. I don’t really believe in mixing them all in – that’s too much of a risk of accidentally deleting things or accidentally altering them. Therefore, I give each wedding its own catalog.

But there are times when I need to get through tons of images at once. Let’s say that I’m digging for all of my cake photos from weddings in 2010. If I have a master catalog with all weddings from 2010 and those photos tagged as “cake”, then this is a breeze. Singular, consolidated catalogs are important to me in my workflow too. There’s room for both in our workflow if we manage it carefully!

Wrapping Up

One catalog or many? You might walk away from this article not having any more of a plan than when you started. That’s okay. Designing, tweaking and perfecting your workflow is a long process that even I still seem to struggle with.

As I’ve said many times before and will say many times hereafter, all of our workflows are different. I don’t shoot the same as you, so we can’t use the same catalog process and expect similar results. It’s neither logical or realistic that the same plan can work for different photographers, shooting completely different events.

I love the idea of keeping a single big catalog for all of my own personal photographic adventures. (That’s something I’ms tarting here soon) But for the safety of my own data and to help me maintain focus, I love my multiple catalog approach.

How do you manage catalogs? Check in with a comment – I’m excited to hear what you think.

Filed Under: Lightroom, Workflow Tagged With: finished

A Sample Workflow: A Day in Lightroom

August 4, 2012 by Andrew Leave a Comment

You know, I spend a lot of time looking at the “pieces” of Lightroom. It’s easy to teach things a few small pieces at a time because that’s how people like to read about it and reference it. But sometimes we need to look at things from the top down and get a good feel for how the process works, from start to finish. Let’s look at it, step by step.

Import

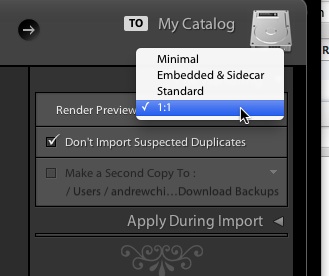
Importing the photos to the computer is the first step that we have. I don’t actually use Lightroom to copy files from the memory card to the computer – I prefer just dragging and dropping them in. However, it still rquires importing them into Lightroom. I will import them without moving the files (which I’ve already copied to my computer’s desktop) and render 1:1 previews as a way to edit faster.

Render 1:1 Previews on Import

Rendering 1:1 previews on import is an important tweak I make in the import stage to allow for faster editing later.

Cull

Next, we move to culling – the process of choosing which photos to keep. I do all of my culling from the Library module. When I’m on a laptop, I use Loupe view to show only one large photo, while using a bigger monitor lets me use grid view with large previews. When I’m photographing, I usually fire a short burst, so knowing what photo is next helps me make a good choice about which photo to keep.

Using grid view with larger previews is a good way to handle culling. Here, I’m using flags to show that all of these photos are keepers that I will deliver.

When culling, my preferred system for the majority of my work is to use the flag system. “Keepers” get flagged as pick, and non-keepers get no flag all. I turn on caps lock on my keyboard, and start the culling process. Leaving caps lock on is going to cause Lightroom to automatically go to the next photo as soon as I make a flag decision. I use P on the keyboard to flag, and U to skip a photo. (U is the keyboard shortcut for unflag, but even if a photo isn’t flagged, it will move to the next one. Another choice is to use X to “flag as rejected”, but I don’t like doing that.)

Develop

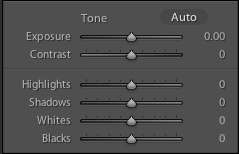
Developing photos is where I spend the majority of my time. Each photo requires a little different treatment, but the general order of things is to adjust exposure and then move from there. That means not only adjusting the exposure, but also working with the highlights and shadows sliders as well as the blacks and whites.

The first thing in my workflow to adjust is always exposure.

From there, I might work with clarity, the tone curve, post crop vignette, color sliders, and basically whatever it takes to get the photo shining. Again, the key here is using the tools you need to achieve the look you want. You have to envision what the photo needs (confidently!) in order to nail the process. We don’t use Develop tools for the sake of using them.

Export

When all of our photos are edited, it’s time to move to exporting the images. There are tons of things to tweak in the export process, but when I’m thinking export, the main thing that I’m thinking about is “where are the images going?” If these are high resolution images that I am delivering to a client, I will export them differently than if they are just going on the web.

To get started with exporting, select a series of images and then right click and choose Export.

The big difference is how big we want to export our images. Sending them to the web means that we don’t need to export them as large as they are out of camera. I might make images for the web 1000 pixels long on the long edge with 72dpi. If I’m exporting to deliver to clients, they’re getting the full size images to do with as they please. Again, every situation is going to call for something a little different, so we have to understand how to use the tools we are given.

Wrapping Up

What questions do you have about the standard order of things in Lightroom? Where do you get stuck in Lightroom, and how can I help you to beat that? Check in with a comment if you need more help.

Filed Under: Workflow Tagged With: finished

Let’s talk about backups.

July 28, 2012 by Andrew Leave a Comment

I’m ashamed I even have to write a post about how important it is to backup all of your photos and Lightroom data. I’m even more ashamed that my own screw-ups have inspired this post.

Way too many photographers are losing data. It seems to state the obvious, but it’s hard to get it back once it’s gone. And by hard, I mean probably impossible. 😀 I’ve been there. It sucks.

Now, I sit on the other side of paranoia. I have to have good backups of my work before I can sleep well at night. Sounds crazy, but when it’s your business hanging over your head, it will stick to your mind.

When it comes to backups, there are a lot of different routes to take. A lot of what you choose has to do with your budget needs. As always, I can only share my personal recipe and you can tweak it to your liking. There are three key parts to my data’s safety, and today I’m sharing my experience.

1) Good Source Data

Too many people keep their computer a complete mess. It puts your data at risk, and makes it harder to perform backups. If the backups are hard to do, how often do you think that you’ll do them?

The problem is that people lose track of things. You really need to think about where you’re storing your data, and how. If you needed to find an important image in 30 seconds, could you do it? With some simple folders, you can get to that level. It just takes planning, time, and a commitment to staying organized.

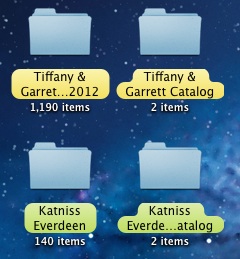
I would probably drive you crazy with how much time I spend organizing. I use simple folder names with color labels on my Mac.

I’ll give you a bit of controversial advice. There have been times in my life when the best solution was to start fresh. If you have a really messy computer and don’t know your way around the data, maybe it’s time to buy a new computer. Move the absolute essentials over and start fresh. Write down a written plan of how you store

One of the ways that I manage my data is to keep my data separate from the OS. In an ideal setup, we have one hard drive, just for the OS (whether that’s Mac or Windows) and one drive just for the data. It makes backing up that “data drive” easy and less complicated. Something to think about! 😀

2) In-House Backups

The key to having a good backup is to have a good routine! A friend of mine was diligent about backups, but he made a huge mistake. For whatever reason, his data on his desktop computer went corrupt. He kept backing it up to the same folder on an external drive, and thus overwriting each backup. By the time he realized that he had been backing up “bad data”, his “good backup” was long gone.

How good is your backup if you can’t restore it? You need to test backups, and make sure that what you’re backing up is good enough to be restored later. Set a schedule for backups, and keep multiple different backups to ensure you can roll back.

In terms of hardware, you’ll want to purchase an external hard drive. This is just like the hard drive that stores your data inside, except that it’s super easy to add on to the computer and is portable.

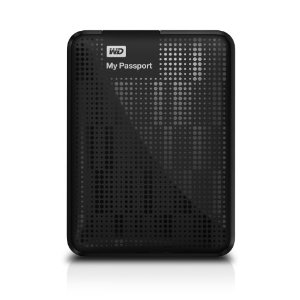
I bought this 1TB Western Digital external drive from Amazon to use for my in-house backups. Fast, reliable, and well reviewed. Don’t always spring for the cheapest external hard drive. Everyone has a brand preference for these, but WD hasn’t failed me yet.

On my external hard drive, I have three backups: quarterly, monthly, and weekly. Should my most recent week go bad, I could roll back to the most recent month. Worst case scenario, we jump back to the beginning of the quarter. I put it on my calendar, get a reminder, and start it before going to bed. Easy as pie, right?

3) Offsite Backups

I really hate to talk worst case scenario, but what if your house floods? Or your office gets broken into after hours? First of all, make sure that you have a good insurance policy. Unfortunately, insurance policies can’t cover your data. When it’s gone, it’s gone in almost all cases of physical destruction.

This is why an offsite backup is so important. An offsite backup can mean a lot of different things, such as keeping a hard drive in a safe deposit box. The key here is to keep the data in another physical location so that physical factors are no longer a concern.

In the year 2012, we live in a time where cloud storage is a real technology that millions are using. Putting your data in the cloud is definitely an offsite backup, and I absolutely love BackBlaze for this. You need to click that link and get setup right now! The trial is free and you won’t regret it. (It’s an affiliate link that will pay for my own subscription, just a heads up :D)

I can’t say enough food things about BackBlaze. It’s been a rock solid online backup solution for me, and the low cost can’t be beat.

Backblaze will automatically keep your stuff backed up, and it will even backup your external drives. The storage plans are unlimited and I’ve found it to have the best software around. It’s for Mac and Windows, and that trial is free so you’ve got nothing to lose. It may take several days to backup depending on your speed, but I highly doubt you’ll regret it.

Wrapping Up

Backups: learn them, do them, love them. 😀 The three steps above that I’ve outlined are a really good starting point for building your own backup plan. Set aside a weekend day sometime soon to get your backup plan down scratch and learn to rest at ease knowing your data is safe!

Filed Under: Workflow Tagged With: finished

Search

Latest Posts

  • Merging Catalogs in Lightroom
  • Troubleshooting Lightroom: 5 Quick Fixes
  • Quick Tip: How did I edit that photo?

All Pages

  • About
  • Contact
  • Get Help
  • Home
  • Lightroom Dictionary
  • Sign up For Updates

Copyright © 2023 · eleven40 Pro Theme on Genesis Framework · WordPress · Log in