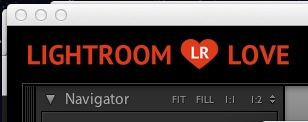
I want Lightroom to feel like home, so I like giving it touches that make it “branded” for me. If you’re using Lightroom to show off pictures to clients, you might want to customize it to show off your logo and brand.
IMAGE HERE WITH OUTCOME
One of the options Lightroom has is to customize the identity plate. The identity plate is the area that you see in the upper left hand corner that usually has the Lightroom logo. When we go custom, we can replace that logo with anything that we want!
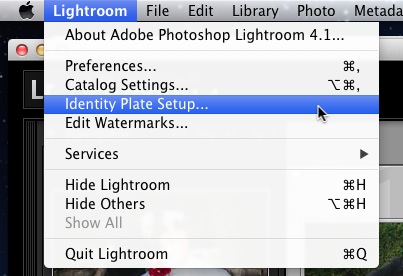
To get started, you’ll need to hit the settings. On Windows, go to Edit, and choose Identity Plate Setup. On Mac, choose the Lightroom menu and choose Identity Plate Setup.
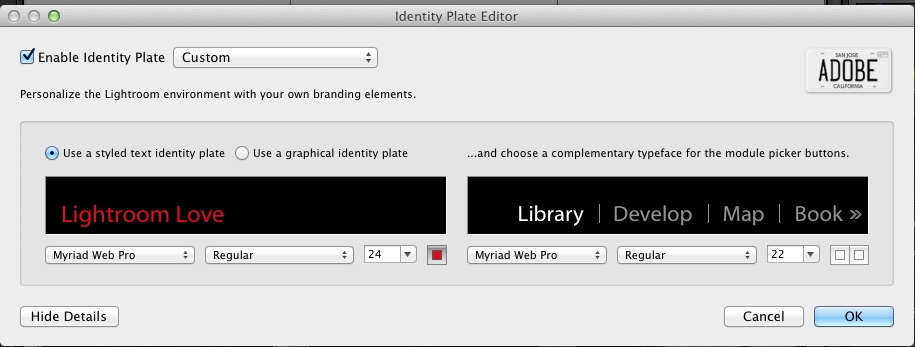
After you’ve entered the options, you’ll see a menu that has a couple of different options. The first of these is to create a custom text based identity plate. This is actually pretty cool because we can use any fonts and colors to build an identity plate. If you have a pretty simple logo, you can probably build it entirely by choosing fonts and text colors.
Have fun playing around with some of the text options that we can use in the Identity Plate Setup.
One important thing is that after we build the identity plate, you save them. That we, we can just use the dropdown menu and jump back and forth to any of the identity plates that we’ve built.
If you want to go more complex, you can also build a graphical identity plate replacement. If you’re going with an “image” type plate, I would recommend popping into Photoshop or another graphics program and creating a graphic to use. Another thing is that we will want to save this as a PNG with transparency so that it appears correctly in Lightroom without a white or black background.
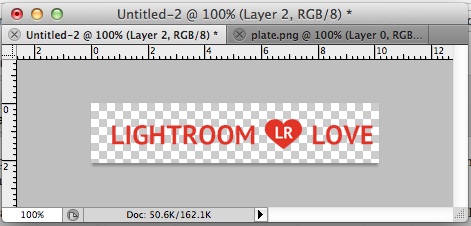
I’m going to get started in Photoshop and start on a canvas that is 288×60 pixels, with a transparent background. I’ve heard people throw around a lot of different sizes, but that’s what works great for me. After opening the canvas, I can drop in the logo and graphics that I want to use for my identity plate.
Dropping the logo on a transparent canvas is the way to get started. A 288 by 60 pixel canvas is perfect from my testing. Leave the logo a little bit of space on the left side!
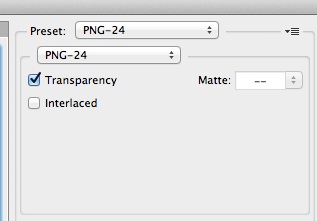
As I wrap up with creating my identity plate, it’s time to save it. In Photoshop, I’m going to go to File and choose Save for Web & Devices. Make sure that you choose a PNG-24 and make sure the Transparency box is checked. Save it somewhere you can remember.
Next, switch back to Lightroom. Choose the box that says “use a graphical identity plate.” Now, click Locate File and point Lightroom to the identity plate graphic that you just saved from Photoshop. Presto! You’ve now got your custom logo as an identity plate.
Note that you can also use a custom font for the name of the modules. On the right side of the options, just choose a font and the menu’s will change to the font of your choice.
Wrapping Up
With a little bit of work, you can customize Lightroom with customized graphics. If you’re going to be spending a lot of time in Lightroom, it can make it feel a bit more like home! 😀
Will you use this? Leave a comment if you need any help.
