It’s easy to pile up tons of Lightroom presets. They’re so handy for editing images and applying styles that it’s easy to see why you’ll rack up tons of them! Luckily, Lightroom allows us to organize these presets really easily, right inside of the program.
First of all, make sure that you are in the Develop module, and viewing the presets panel on the left side. This is where we can do all of the organization of our presets.
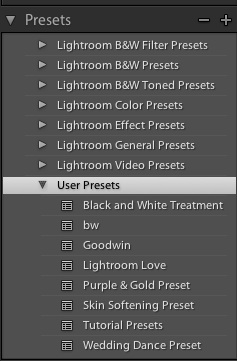
So let’s say that our “User Presets” folder has piled up a few presets like mine has, and I want to organize them.
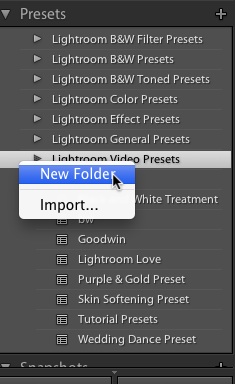
We can use the preset folders to keep things nice and tidy. Right click (or command click on a Mac) next to an existing preset folder to pop up a new menu. Choosing “new folder” will open a box to allow you to give the folder a name.
Now, all that we have to do is drag and drop presets into the new folder to reorganize them! We can literally click on a preset name and drag it into the new folder that’s been created.
Another thing – once we’ve cleared out a folder of all of the presets, you can follow the same right click procedure to delete the folder if you’re looking to clean it up. Take five minutes and clean up your presets for quicker working in the future!
Need more help organizing? Leave a comment and I’ll get back to you ASAP.

