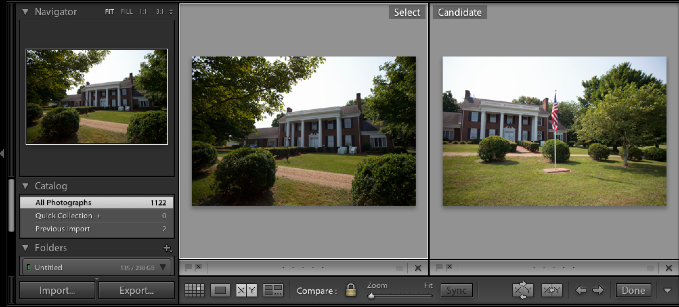
Do you ever face a tough decision about which image to keep? Sometimes it’s hard to pick that “best” image out of a few. Lightroom offers a feature that allows us to place two images side-by-side and determine which one we prefer. This is called compare view, and it’s a great way to two-up images and make the choice easier.
Compare view takes place in the Library module. To enter Compare view, press the the letter C on your keyboard, or press the compare view button just below the image workspace.
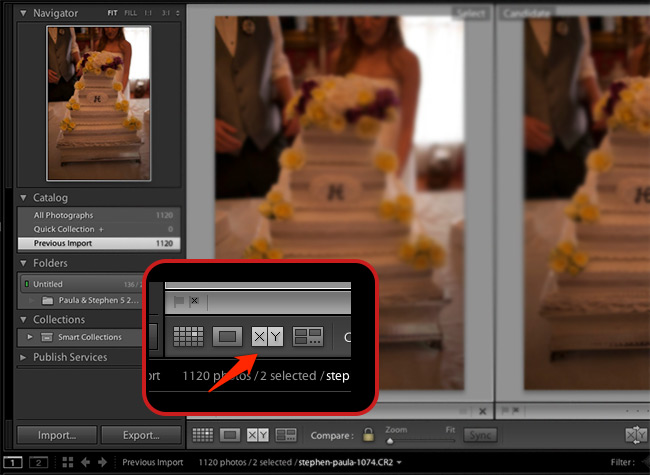
You can press “C” on your keyboard to enter compare view, or press the button just below the image workspace.
After you start up compare view, you may be wondering how to change the two images that are shown in the comparison grid. Lightroom lets us pick any two images to compare, even if they are completely unalike. Entering compare view chooses the image was already selected, plus the image that is directly after it.
Lightroom’s Compare view always shows two images, which it calls Select and Candidate. The select image is on the left and the candidate image is on the right.
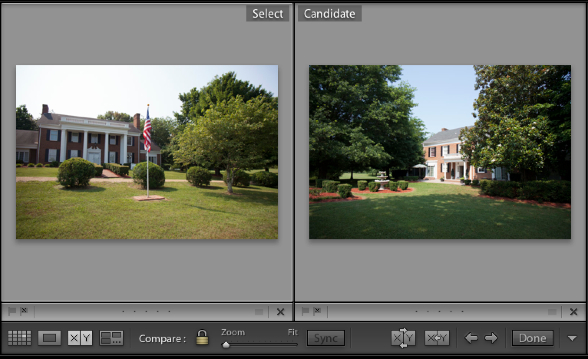
The “select” image is shown on the left while the “candidate” image is shown on the right. Think of the select image as your current favorite, while the candidate is a candidate to replace it. You choose the select image by clicking on it on the filmstrip, and the keyboard arrows choose other “candidates.”
I always think of the Select image as my favorite, and the Candidate as the image that could possibly replace it.
Clicking on any image on the filmstrip chooses it as the Select image. You can change the Candidate image by using the keyboard arrows, left and right.
In this case, I’m picking my favorite image of the wedding venue. I clicked the first in the series to choose it as my select, and then used the keyboard arrows to continue scrolling through the other selections. Putting them side by side turns this into an easy visual decision.
After you find one that you like better, press the button in the screenshot below to name a new “Select” image.
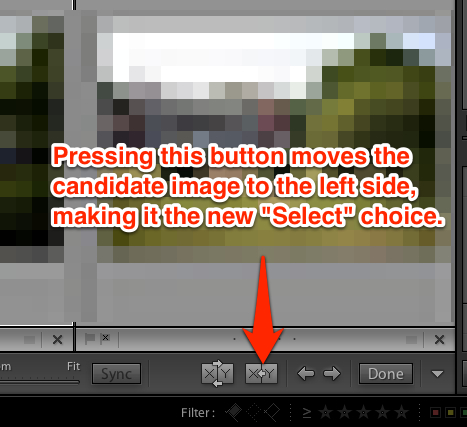
Clicking the button illustrated above names a new “select” image for the left side of the image workspace.
You can repeat this process as many times as you wish, cycling through selections and candidates until you come to a decision.
One more tip: when you’re showing two images side by side, you probably want to see the two images as large as possible. To increase the size of the previews, hiding the panel on the left is a great way to do so. Press the arrow to the far left of Lightroom to hide the left side menu. You can always click the arrow to bring that panel back.
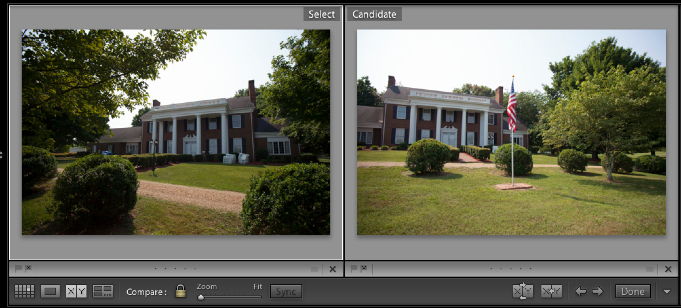
After hiding the left panel, the view of the images is much greater as they take up the entire area.
Compare view is a nice tool for selecting the best image out of a set. When you’re looking to make those tough decisions between two great images, consider using compare view to do so.
Let’s recap:
- Compare view is super handy for choosing between two images
- The “select” image stays on the left, and candidates are shown on the right side of the workspace
- Clicking on an image puts it on the left side (select), while using the keyboard arrow buttons puts images in candidate view
Are you using compare view to select your best image? Leave a comment if you are using compare view or plan to start.
