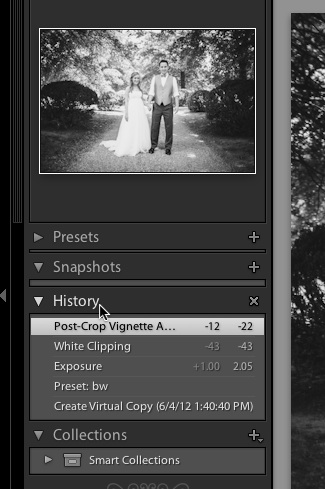
Looking to find out the settings you’ve applied to an image in Lightroom? Sometimes we forget and want to remember how we got that perfect look for our image. I’ve got a really quick tip for you today that will help you do just that.
To do that, we use the History panel in the Develop module. Go ahead and open it by clicking on the word “history” if it’s not already visible.
Now, it’s clear the settings that we’ve applied to a given image. Let me walk you through how I modified this image:
- I created a Virtual Copy to work with a separate edit of the image.
- I applied a preset that I call bw that gives my images a black and white effect
- I added +1.0 stops of exposure to brighten the photo up
- I played with the whites setting, bringing it down by a value of 43
- I added a post crop vignette, with a value of -12
Using this history panel, it’s so easy to find out how we treated an image, and presumably make notes about how to achieve the same look with other images. This is also a great time to build a preset! (Hint, hint.)
