Cropping is so important because it can really improve our composition, and we all know about the importance of composition. One of these days, I’ll fill your head with composition ideas, but this is the 10 Minute Guide. 😀 That’s right, in about 10 minutes, we’ll make sure that you can get started with good cropping in Lightroom.
Someday, we’ll take a little closer look at some of the advanced ways to crop photos in Lightroom. But today, we’re taking a look at how to get started with cropping photos in Lightroom in a quick way.
Okay, to get started, let’s make sure that you’re in the Develop module. You can click Develop on the list of modules (upper right hand corner of Lightroom) to enter it, or press D to enter it as well.
Entering the Develop module lets us get started with cropping.
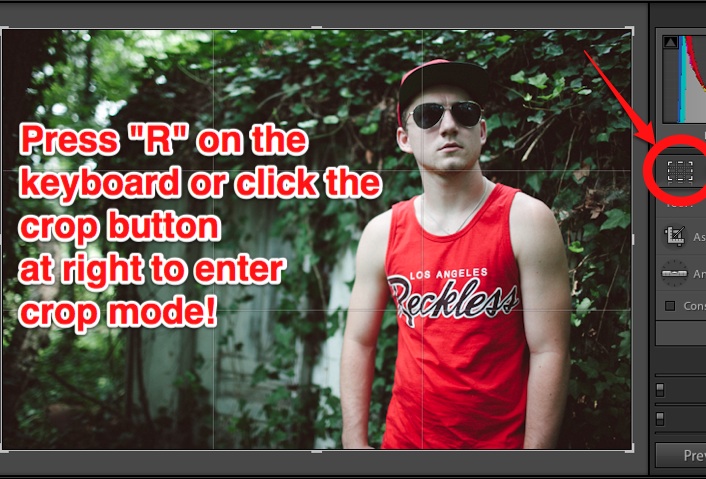
Next, go ahead and pick out the image that you want to work with. To get started with cropping, Press R on the keyboard, or press the crop button (far left) just under the histogram.
Now, we’re ready to get started. You’ll see that a grid has appeared on top of your images, and this is the basis for all cropping.
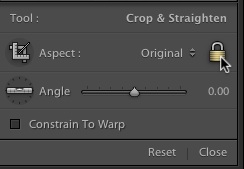
I’ll make a recommendation here: go ahead and press the lock button on the options on the right side. This will keep the dimensions of the photo locked so that we don’t create funky crops. It will basically keep the image the same “shape” as how it comes out of camera. If you want to create
Clicking the padlock locks the aspect ratio.
Okay, now that that’s taken care of, here’s my recommended way of cropping:
1) Grab a control handle of the photo. These are the thick lines that are at the corners and in the middle at top and bottom. You’ll see your cursor change, and dragging makes the rectangle smaller in area.
2) After you’ve made a smaller box, just drag the box to the area that you want to keep.
After making a smaller box, I just drag the new smaller area to the “keeper” area”. Anything in darker gray is going to be cropped out.
After you’ve done that, just press R on the keyboard again to leave crop mode and you’ll find your new crop!
Just two steps: resize a smaller area, and drag it to the part we want to keep
Another method is to just draw the rectangle over the area of the photo you want to crop to by clicking and dragging the box. If you want to “start from scratch” with the crop, that’s the best way of doing it.
So there you have it – you’ve got a really quick and easy crop method! I can do most crops in under 10 seconds after mastering the tool.
Did I explain this clearly? This is fairly easy to do, but a little tough to get started with. If you need more help, check in with a comment and I can explain more. 😀


