Lightroom Love

  • Home
  • Presets
  • Get Help
  • Contact

Troubleshooting Lightroom: 5 Quick Fixes

April 1, 2020 by Andrew Leave a Comment

You’re editing late at night and suddenly Lightroom just won’t behave. For one reason or another, that thing you always do… just isn’t working. First of all, suffering from fatigue can throw me completely off. I’ll find myself making ridiculous mistakes.

These troubleshooting steps are designed to help you look for the quick things to look for to get you back on the right track.

1) Make sure you’re in the right module.

The Lightroom 4 modules.

If you’re in the Print module but attempting to edit your photos, your controls aren’t going to be where you expect them to be. I can’t tell you how many times this has caused a quick panic while working.

2) Make sure caps lock is off.

I’ve talked about this a few times before – several buttons or keys in Lightroom act as “modifiers” that alter our shortcuts. When caps lock is in, it’s going to make Lightroom behave differently. If that’s not what you want, ensure you haven’t turned it on.

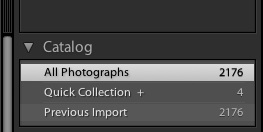
3) Photos disappear? Make sure you’re viewing “all photos”.

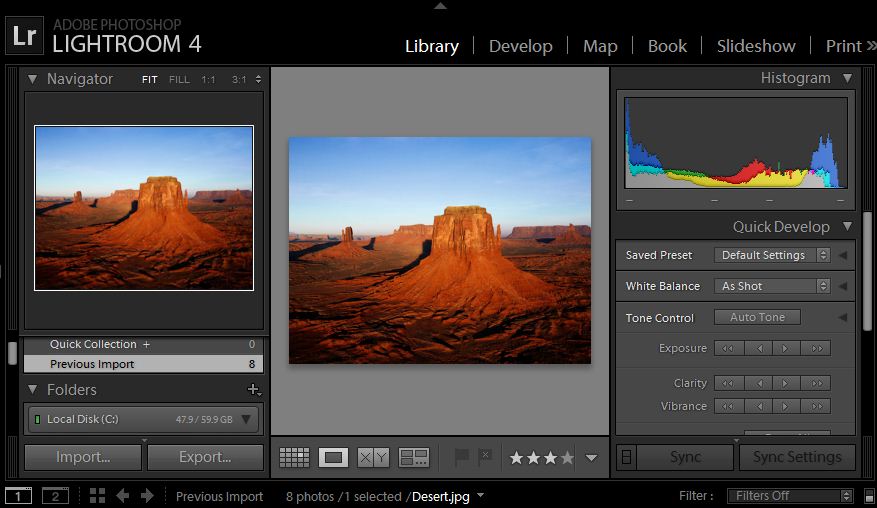
In the Library module, make sure that you are setup to view All Photographs under the catalog dropdown. I’ve accidentally switched to Quick Collection or Previous Import before realizing what had happened.

4) Check your filter.
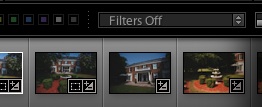
Another fix to the “disappearing” photos issue is making sure you haven’t applied some weird filter. I don’t rate images with stars, so when I filtered by photos 4 stars or higher, all of my images were bound to disappear.

5) Give Focus to Lightroom

Oh boy. I’m not proud to share this story. One night, after a marathon editing session, I was multi-tasking (huge productivity killer by the way; most people think they are good multi-taskers but they aren’t.) and was also working in iTunes or Chrome or something. Regardless, I had minimized the window, but still had “focus” on Chrome – meaning that all of my keyboard strokes were not being read by Lightroom. This went on for a solid two minutes before I maximized Lightroom and restored order. (Ever had one of those “am I still sane moments?” This was mine.)
 

Filed Under: Lightroom 101 Tagged With: finished

Quick Tip: How did I edit that photo?

March 31, 2020 by Andrew Leave a Comment

Looking to find out the settings you’ve applied to an image in Lightroom? Sometimes we forget and want to remember how we got that perfect look for our image. I’ve got a really quick tip for you today that will help you do just that.

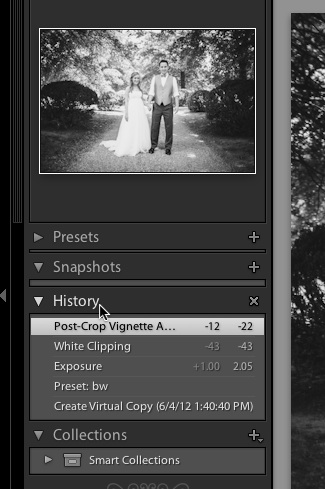
To do that, we use the History panel in the Develop module. Go ahead and open it by clicking on the word “history” if it’s not already visible.

Lightroom’s History panel shows each effect that we’ve applied to an image, step by step.

Now, it’s clear the settings that we’ve applied to a given image. Let me walk you through how I modified this image:

  • I created a Virtual Copy to work with a separate edit of the image.
  • I applied a preset that I call bw that gives my images a black and white effect
  • I added +1.0 stops of exposure to brighten the photo up
  • I played with the whites setting, bringing it down by a value of 43
  • I added a post crop vignette, with a value of -12

Using this history panel, it’s so easy to find out how we treated an image, and presumably make notes about how to achieve the same look with other images. This is also a great time to build a preset! (Hint, hint.)

Filed Under: Lightroom Tagged With: finished

How to Rename Lightroom Catalogs

March 1, 2020 by Andrew Leave a Comment

You may occasionally need to change the name of a Lightroom catalog. Maybe you made a typo or need to clean up a long folder name; either way, Lightroom doesn’t offer an easy way to do this from within the program. We’re looking today at how to do it manually.

First up, you need to browse to wherever you have your catalog stored. When you created a new catalog, you had to choose a location to store the catalog. If you’ve forgotten where you stored it, I would suggest doing a search on your computer for your the catalog name.

If you lose track of the current name of your catalog, just check the top of the Lightroom window in the center.

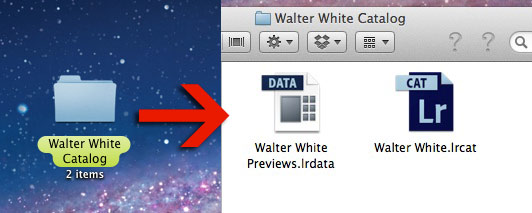
Okay, once you’ve tracked down the folder with the catalog, this is how Lightroom catalog folders are typically setup: when we create a new catalog, it creates a folder with two files inside of it. All three of these share a common name, with a few slight differences. Here’s how a typical catalog folder looks:

This is how Lightroom catalog folders typically look; inside are two files: a catalog file (.lrcat) and a preview files, with the .lrdata at the end. We need to rename all of these to rename the catalog.

First, make sure that we’ve shut down Lightroom. Next, we’re ready to start the renaming process. I will rename all three of these files to a common name. Now, it’s important to keep the parts that Lightroom has added the same. For example, on the Previews file, called “Walter White Previews.lrdata”, it’s important to leave that “previews” bit the same.

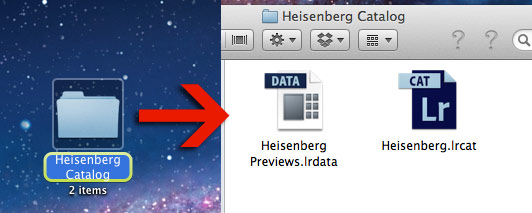
Basically, for this rename, I’m changing all instances of “Walter White” to “Heisenberg”, and leaving everything else untouched. Simple enough, right? This is how it looks after renaming.

I changed all instances of “Walter White” to “Heisenberg” and left everything else untouched.

The next time that we open that catalog in Lightroom, you’ll notice that it has recognized that we changed the catalog’s name at the top of the program.

All told, you can get a catalog renamed in around a minute once you know how! Honestly, I’m hoping that Adobe makes it even easier than this in the future.

Are you having any issues getting this done? Feel free to let me know in the comments.

Filed Under: Lightroom Tagged With: finished

What is a Lightroom Preset, and why are they so handy?

January 9, 2020 by Andrew Leave a Comment

Hi there Lightroom fans! On the first day of Preset Week, we’ll take a look at the power of Lightroom presets. Think of Lightroom presets like recipes, only much easier to follow! Presets let us save our editing styles, and apply them with one click. Ā Once we get the “look” of an image that we want, we can build a preset so that editing another image in the same way takes only one click. That should get you excited. šŸ˜€

Presets let us save our editing styles, and apply them with one click.

PresetsĀ play an important role in Lightroom. They’re handy for replicating our editing style. With just one click, we can apply the same style to our photos over and over. This means that we can edit consistently and quickly. Presets are going to automate the editing process and reduce a lot of work to just one click.

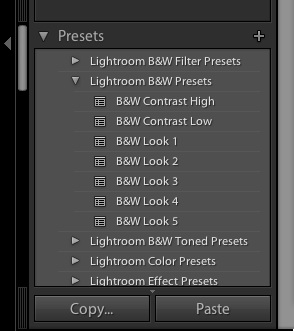
Lightroom comes with quite a few presets built in! You can apply them in the Develop module, and you’ll find the preset panel on the left side, just below the Navigator.

Presets get applied in theĀ DevelopĀ module. They have their ownĀ panelĀ on the left side of the Develop module just under the Navigator. To apply a preset, all you have to do is click the name of the preset. Boom, presto preseto! The image gets all of the preset settings applied to it instantly.

By default, Lightroom comes with some pretty good presets that you can play with. You can also download many presets for free across the internet, and several great paid preset packs are out there as well.

Getting excited about presets yet? If you didn’t know about them before now, you might be getting excited about the speed at which we can apply our editing styles with presets. Stay tuned for the rest of Preset Week as we take a look at how to build your own presets and much more.

Any questions? How are you today?

Filed Under: Presets Tagged With: finished

How to Import Lightroom Presets

December 30, 2019 by Andrew Leave a Comment

Lightroom presets are awesome. Here’s how to use presets. With just one click, we can apply editing styles to our photos in Lightroom. What’s even better is that we can download and trade presets! However, we have to import them to get Lightroom to recognize the added presets. Today, I’ll be showing you how.

First thing is first. You have to have some presets that you’re wanting to load into Lightroom. Lightroom presets have a file extension of .lrtemplate . You might download presets that are compressed or zipped – .zip files – but the files that we need to feed to Lightroom are .lrtemplate files. Zip files need to be extracted or decompressed, and you can do this easily in your OS. (Here isĀ Windows help;Ā on Mac, just double click to extract a zip)

Okay, so now we have our preset ready to import. Go ahead and note what folder that preset is in because we’ll need to browse to it in just a moment.

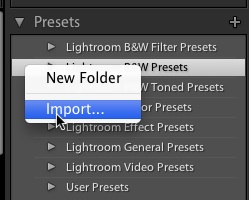
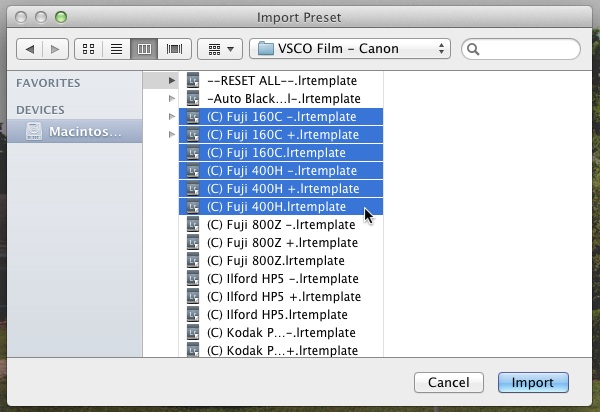
Now in Lightroom, in the Develop module, make sure that on the left panel, you can see the presets already in Lightroom. Place your mouse cursor in the preset area, then right click to bring up a menu. Go ahead and choose “Import”.

Okay, so now we will show Lightroom where our presets are. I’m on a Mac, but this is basically the same on the Windows platform. All you have to do is browse to the folder where .lrtemplate files are stored, and then click to import them. We can also shift click two presets to select a long list of presets, or control clickĀ to select multiple presets. Here, I’m using the VSCO Film Presets, which I highly recommend purchasing.

That’s all! Your presets will appear in that panel on the left and you’re free to apply them to your heart’s content.

Filed Under: Presets Tagged With: finished

5 Steps to Faster Culling

December 16, 2019 by Andrew Leave a Comment

Every step of our photo editing process is important., but there’s something essential about culling. Culling, the process of cutting down our shoot to our “keeper images” is where big decisions get made about which images will make the cut.

The problem with culling is that it’s time consuming. It takes serious time – and energy (in the form of decision making) to get our keepers cut down. Today, I’ve got five of my favorite tips for how to expedite this process.

1) Do it all at once.

After I throw a series of images into Lightroom, the first thing I do is cull in the Library module. Period, no questions asked. I won’t do any editing (Develop module) work until I have my images narrowed down to exactly what I need post-culling process.

Before adopting the “all at once” approach, I spent too much time jumping around in Lightroom. I might cull for an hour, edit those photos, export etc. Terrible approach – knock out all of your culling all at once.

2) Build a system.

Photographers have all types of systems for culling their images. Some use flags to mark keepers, others use color labels, and still others like to use the star system. Whatever route you want to take, make a choice and stick with it! The more that you can learn your routine, the more you can reproduce it. Routine helps us keep our creative thoughts organized.

Filter by color label is one system photographers use to cull.

3) Use the keyboard.

I can’t say enough about the power of the keyboard shortcuts that I’m always talking about. You don’t realize how much time you lose by moving your hand back and forth to the mouse. A quick refresher on a few keyboard shortcuts:

  • Flag: P to mark as a pick, U to unflag a photo
  • Color labels: use the keyboard numbers 6, 7, 8, and 9 to apply color lables
  • Star ratings: use the keyboard numbers 1-5 to apply star ratings

When it comes to culling, I think that using the keyboard is the only way to go. Here’s a quick tip for you, free of charge! When culling, make sure Caps Lock is on on your keyboard. This auto-advances you to the next photo to mark it is a pick, give it a color label, etc.

4) Be confident.

This might sound like a silly tip, but this is one thing that I used to miss out on. I would deliberate or agonize over “should I keep this one or the one right after it?” and find myself taking forever to finish culling.

We’re digital these days. If I find that I’m missing a photo in my the editing stage, I simply switch back and add that photo to my selections. Do we want to get the cull right the first time? Absolutely. But we aren’t dealing with life or death, one time opportunity type work here.

5) Enjoy it!

This might not make it faster, but it will certainly make the time pass more rapidly. Culling is rarely mentally-intensive work, so I almost always have something going in the background. A good episode of SVU on Netflix or one of my favorite stations on Pandora has set the stage for lots of long nights of getting my favorite photos picked for Development.

What are your favorite culling tips? What challenges you to get your work done?

Filed Under: Lightroom Tagged With: finished

Make Lightroom Work For You!

March 2, 2019 by Andrew Leave a Comment

A reader recently wrote into me with the following message:

I love the blog. I’m learning so much about how to use Lightroom. I can follow all of the guides, but my photo life is still a mess. I know how to do things, but not how to use them on my own images.

The truth is that I can only dole out so much advice. As you’ll often see me write in my posts, I will give you advice based on how my workflow works. There’s a problem with that though.

I don’t shoot like you. I shoot different things, with different cameras and onto different computer systems. If you try to copy me, it won’t work as well for you. It’s not because my workflow is great (it’s certainly not), it’s because the core worth of the workflow is that it meets our needs as a shooter.

I can only do so much to provide help. I used to be like you – I would follow tutorials and guides to a “T”. And yet, it didn’t help me to solve my problems or increase my creative work. The issue is that I was so busy trying to imitate others, that I didn’t innovate on my own work.

The issue is that I was so busy trying to imitate others, that I didn’t innovate in my own work.

I hope you will explore the site and take a look at the advice I offer, as well as the way that I recommend doing things. But you’re going to have to work with your own images to get the hang of how to apply all of your knowledge. Make Lightroom work for you.

I won’t ever claim that anything I do is the best way to do something. I create solutions to my own issues. My posts, I think, are a good mix of how to do things and why to do them. If you understand the techniques and steps to take to accomplish things, you might begin to understand how you can apply them to your own image needs.

With all of that said, I’m always available for help. Check in in the comments or shoot me an email on the contact page so we can help you do what you do.

Filed Under: Lightroom Tagged With: finished

Lights Out in Lightroom

January 19, 2019 by Andrew Leave a Comment

I’m always trying to eliminate distractions. Whether it’s putting my iPhone in airplane mode, unplugging my Internet, or escaping outside, I think eliminating distractions are so key in creative work. Luckily, Lightroom will even let us eliminate distractions within the program usingĀ Lights OutĀ mode in Lightroom. Kind of like focus mode or dark mode on steroids.

Lights On

Standard “lights on” view in Lightroom.

Now I’m sure you’re familiar with what Lightroom’s interface typically looks like. Sure it’s great – but the issue at hand is that there is so much going on.

This tip will work for you in any module, and allows you to really hone in on your image. To enable Lights Out mode, go ahead and press “L” on the keyboard.

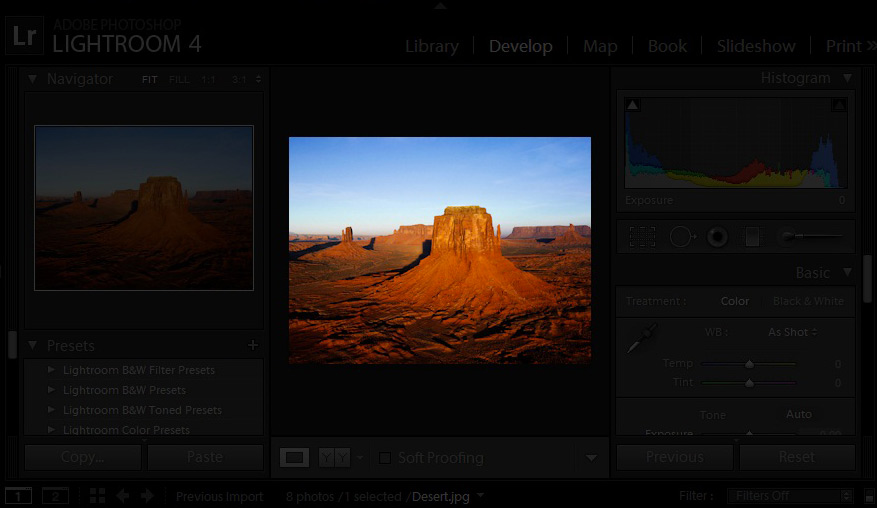
The lights are now dimmed, and the background is mostly out of view.

Press “L”Ā one more time and here’s what happens:

The distractions are now completely out of view. All that we need to do is press “L” one more time to return to the default view, turning the lights back on.

Filed Under: Lightroom Tagged With: finished

The 10 Minute Guide to Cropping in Lightroom

December 20, 2018 by Andrew Leave a Comment

Cropping is so important because it can really improve our composition, and we all know about the importance of composition. One of these days, I’ll fill your head with composition ideas, but thisĀ isĀ the 10 Minute Guide. šŸ˜€ That’s right, in about 10 minutes, we’ll make sure that you can get started with good cropping in Lightroom.

Someday, we’ll take a little closer look at some of the advanced ways to crop photos in Lightroom. But today, we’re taking a look at how to get started with cropping photos in Lightroom in a quick way.

Okay, to get started, let’s make sure that you’re in theĀ DevelopĀ module. You can click Develop on the list of modules (upper right hand corner of Lightroom) to enter it, or pressĀ DĀ to enter it as well.

Entering the Develop module lets us get started with cropping.

Next, go ahead and pick out the image that you want to work with. To get started with cropping,Ā Press RĀ on the keyboard,Ā or press the crop button (far left)Ā just under the histogram.

Lightroom crop start

Now, we’re ready to get started. You’ll see that aĀ gridĀ has appeared on top of your images, and this is the basis for all cropping.

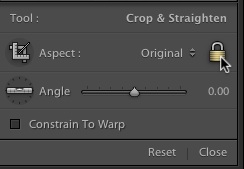
I’ll make a recommendation here: go ahead and press the lock button on the options on the right side. This will keep the dimensions of the photo locked so that we don’t create funky crops. It will basically keep the image the same “shape” as how it comes out of camera. If you want to create

Clicking the padlock locks theĀ aspectĀ ratio.

Okay, now that that’s taken care of, here’s my recommended way of cropping:

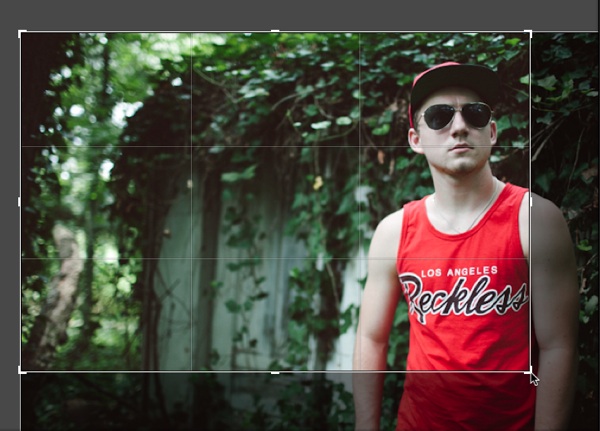
1) Grab a control handle of the photo. These are the thick lines that are at the corners and in the middle at top and bottom. You’ll see your cursor change, and dragging makes the rectangle smaller in area.

Crop Rectangle

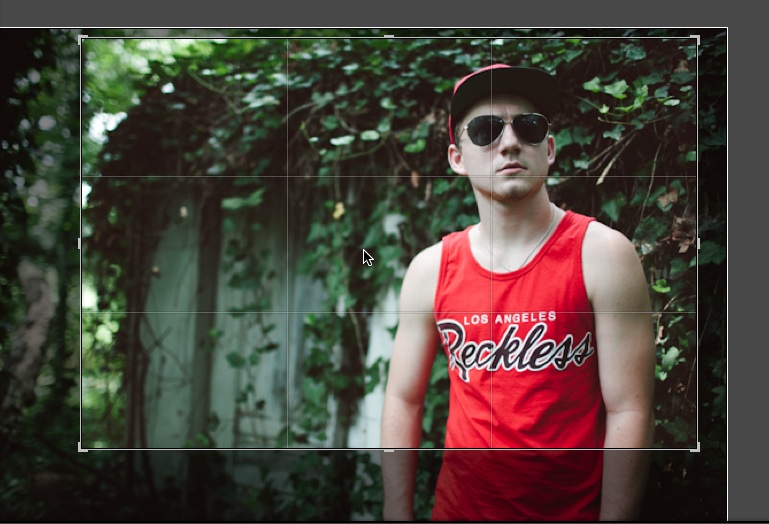
2) After you’ve made a smaller box, just drag the box to the area that you want to keep.

After making a smaller box, I just drag the new smaller area to the “keeper” area”. Anything in darker gray is going to be cropped out.

After you’ve done that, just pressĀ R on the keyboard again to leave crop mode and you’ll find your new crop!

Just two steps: resize a smaller area, and drag it to the part we want to keep

Another method is to just draw the rectangle over the area of the photo you want to crop to by clicking and dragging the box. If you want to “start from scratch” with the crop, that’s the best way of doing it.

So there you have it – you’ve got a really quick and easy crop method! I can do most crops in under 10 seconds after mastering the tool.

Did I explain this clearly? This is fairly easy to do, but a little tough to get started with. If you need more help, check in with a comment and I can explain more. šŸ˜€

Filed Under: Lightroom Tagged With: finished

Should I buy Adobe Lightroom?

December 16, 2018 by Andrew Leave a Comment

This post is aimed at users who have never used Adobe Photoshop Lightroom. If you’re wondering if you should upgrade from Lightroom 3, check out this post.

If you’ve taken notice of this site’s name, you can probably get a good idea of what my answer to the question is. But my path to using Lightroom might surprise you.

Given the name of this site, you probably already know my answer.

When I first used Adobe Lightroom, I hated it. I had buyer’s remorse about buying it. I hated the complexity of it, as well as

The problem wasn’t the program. The problem was how I used it.

I’m reminded of a quote a favorite teacher shared with me about how best to attack big problems (or in this case, big programs):

How do you eat an elephant? One bite at a time. 

Attempting to jump into Lightroom and bite it off all at once is not going to end well. Instead, approach Lightroom seeking to solve your problems. As I’ve said before, each of the modules is really a solution.

If you’re serious about taming your image collection, learning Lightroom is the best investment of your time. In my opinion, there are no other applications that come close to rivaling the power of Adobe’s photo management software.

Filed Under: Lightroom Tagged With: finished

Next Page »

Search

Latest Posts

  • Merging Catalogs in Lightroom
  • Troubleshooting Lightroom: 5 Quick Fixes
  • Quick Tip: How did I edit that photo?

All Pages

  • About
  • Contact
  • Get Help
  • Home
  • Lightroom Dictionary
  • Sign up For Updates

Copyright © 2023 Ā· eleven40 Pro Theme on Genesis Framework Ā· WordPress Ā· Log in