Prior to Lightroom 4, there was an aspect of the program that I was spending a lot of time explaining and clearing up. And quite frankly, I was usually at a loss for words on how to explain it. Users really wanted to know how to use a certain set of controls, but were struggling with just how they worked.
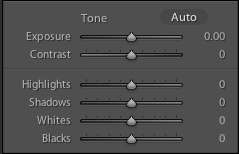
The controls that I’m talking about are the exposure controls. These affect how we control the lighting and basically the brightness of our images. We can push images darker or brighter using the exposure controls in Lightroom. These controls have changed pretty significantly over the last couple versions of Lightroom, and today I want to spend some time talking about how they’ve changed.
In Lightroom 4, a new Develop process was introduced, called the 2012 develop process. Lightroom’s first developing engine was labeled the “2003” development engine, and Lightroom 3 brought with it the 2010 develop process. These are basically technical differences, but just realize that each of these carry with them some different ways that we control images.
Exposure controls are simply the controls that allow us to handle the lighting of our images. In Lightroom, each of these are on sliders that let us control how much adjustment we want to make. You’ll find all fo these controls in the Develop module, where we edit and tweak our images.
In Lightroom 3 and prior to that, the exposure controls were:
- Exposure – slider used to generally adjust the overall brightness of the photo
- Recovery – used to recover detail in bright areas
- Fill light – used to add light to darker areas
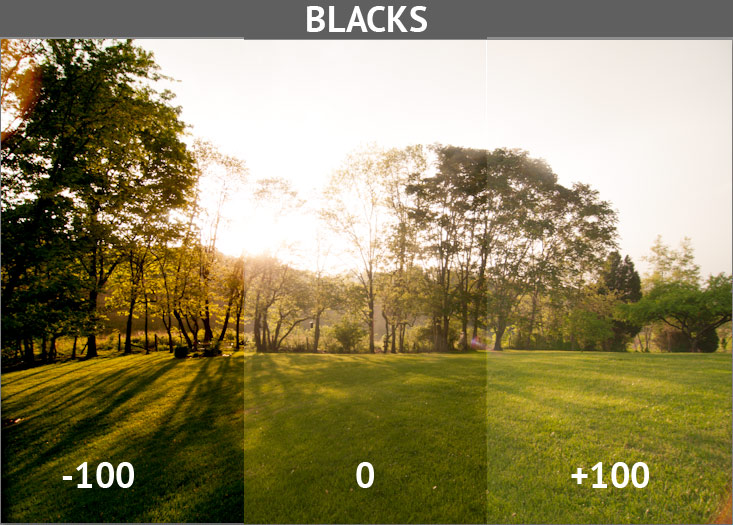
- Blacks – we could use the blacks slider to push the dark areas of the photo to deeper dark tones
- Brightness – brightness makes the image brighter in general (again, this is a feature that’s hard to explain)
- Contrast – contrast is the difference between the dark and bright areas of a photo, and we can increase or decrease this
- Exposure – slider used to generally adjust the overall brightness of the photo
- Contrast – contrast is the difference between the dark and bright areas of a photo, and we can increase or decrease this
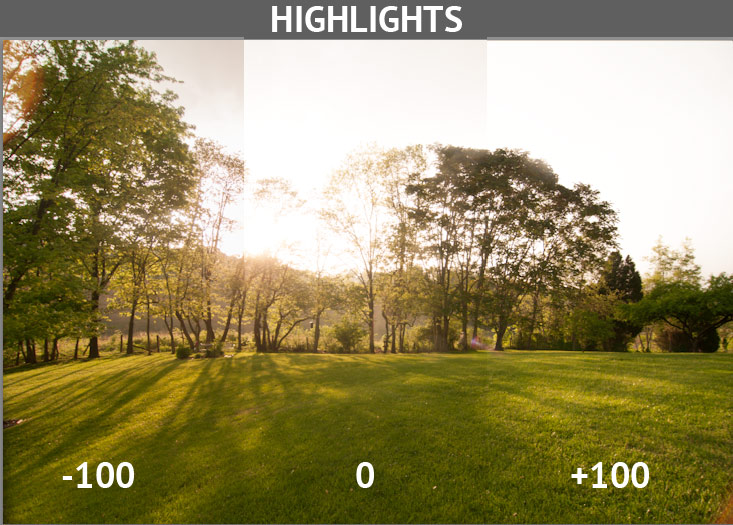
- Highlights (new!) – allows us to fine-tune the brightest areas of the photo
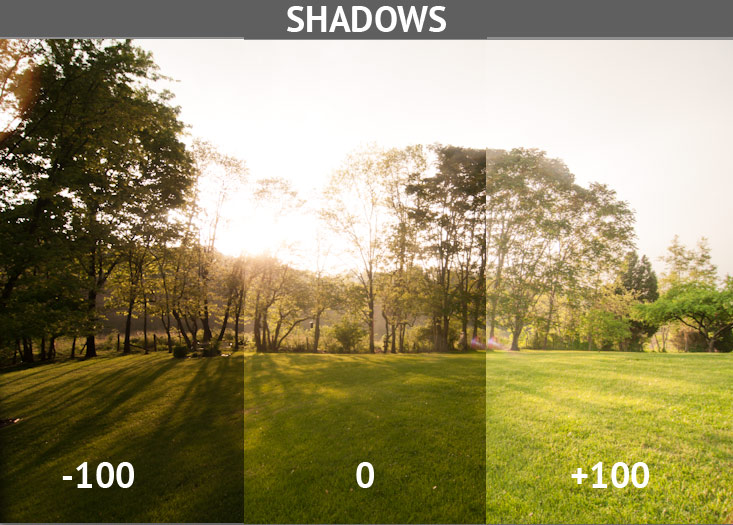
- Shadows (new!) – control exposure in the shadowed areas of the region, pushing them darker or lighter
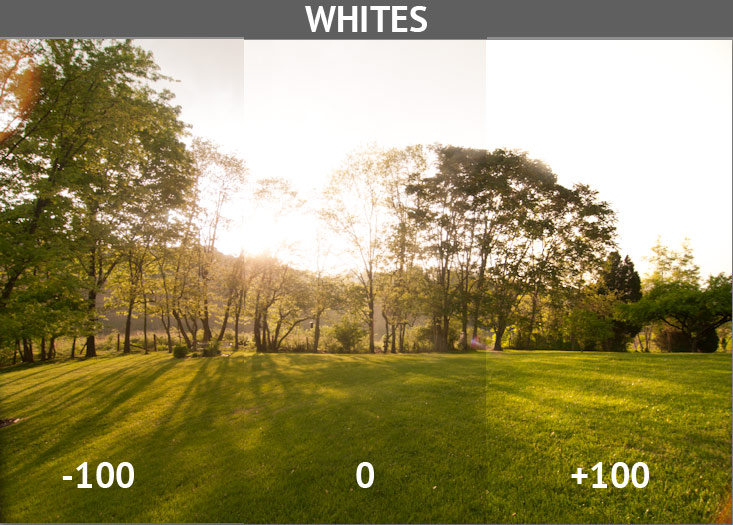
- Whites (new!) – control the “white” areas of a photo, pushing them darker or lighter
- Blacks – we can use the blacks slider to push the dark areas of the photo to deeper dark tones
I want to take some time and show you how these sliders will affect an image. As always, it’s best to get hands on with Lightroom and try these controls yourself to see what you can do with the sliders.
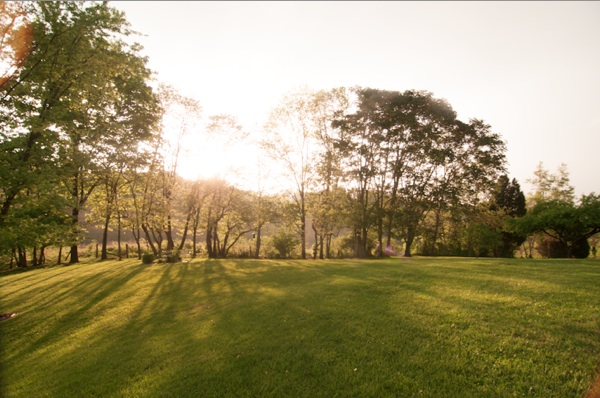
I’m using this photo as an example to show how the new controls work. This is the image, straight out of camera:
This photo has the a good tonal range. We have some dark areas, which the shadows or blacks slider will control. We have some bright areas, which the highlights and whites will control.
For each of the images, I’ve split the image into three sections, and then tweaked the sliders to all extremes so that you can see how they control an image.
Highlights –
Shadows –
Blacks –
Whites –
Highlights, shadows, blacks, and whites sliders are all brand new in Lightroom 4 and were very welcome changes for a long-time user like me. I think that these changes are huge in allowing us to really nail the way we want our image to work. The new controls can be a little bit of work to get used to, but I’m completely wowed at the way it has helped me do my job.
What do you think about Lightroom’s new sliders? Let me get your opinion on how Adobe handled this, or let me know if you need more help!

