Hello again Lightroom learners! Today, I’m sharing a post that I’ve been excited about for a long time. This post, more than any other, will teach you the power of Lightroom in editing lots of images at the same time. I usually refrain from using the word “stupid” but I just don’t know of another way to describe how fast this editing technique is.
We’re talking today about syncing settings. And I’m ashamed to say I used Lightroom for over a year before I ever began using it. Now, I’m counting the hundreds of hours that I probably wasted!
What is “Sync?”
You’ll find the “Sync” button to appear in the Develop module. This makes sense because we’re taking the develop settings from one photo, and cloning them onto another photo.
To sync settings you must first select an already edited photo. Any photo that has had some edit tweaks applied to it will work.

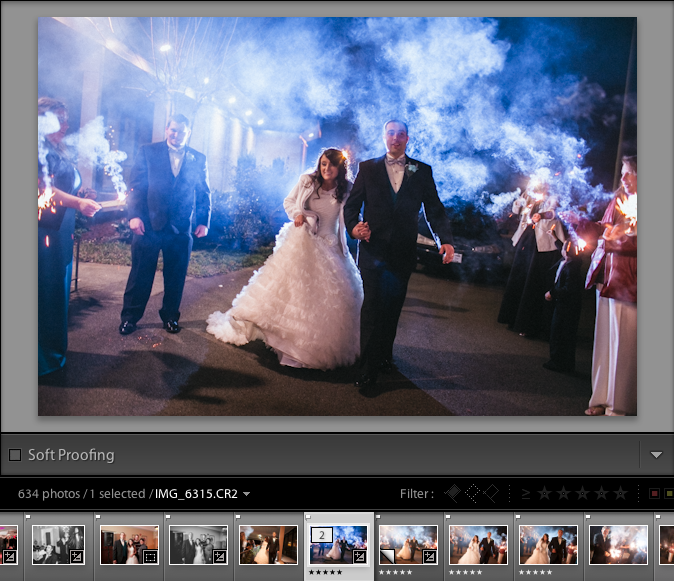
You can see here that I’ve edited one of these wedding exit photos just the way that I wanted, applying some exposure and color tweaks.
I’ve gone ahead and edited one of the wedding exit photos above. On the filmstrip, you can also see that there are four more following it that are currently unedited. The lighting and setup of those images is almost exactly the same, right? So why re-edit the rest of the images and use up lots of time doing so?
Why re-edit the rest of the images and use up lots of time doing so?
Hello, “Sync.” 😀 This is the perfect opportunity to take the first image, and sync the edits we applied to the images that come after it.
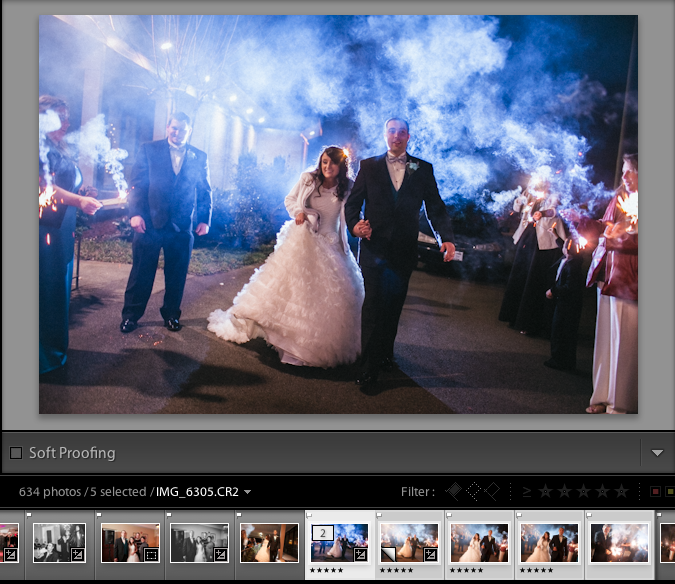
To sync those settings, we have to select the other images. We need to keep the image we’ve already edited selected, but also multi-select the images coming after it. On the filmstrip, hold the shift button on the keyboard, and press the last image in the series. This selects all images in between.

To select the other images, hold shift and click the last image in the series on the filmstrip. All images will be “multi-selected.” It’s very important that we keep the already edited image selected in the main area above, so don’t click away from it!
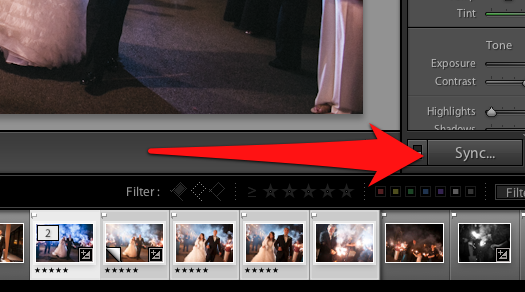
Once you’ve selected a few images, you’ll see the sync button appear on the right side. Go ahead and click it to start the syncing process.

Once you’ve multi selected images, the button changes to “sync.” Press it to get started with syncing.
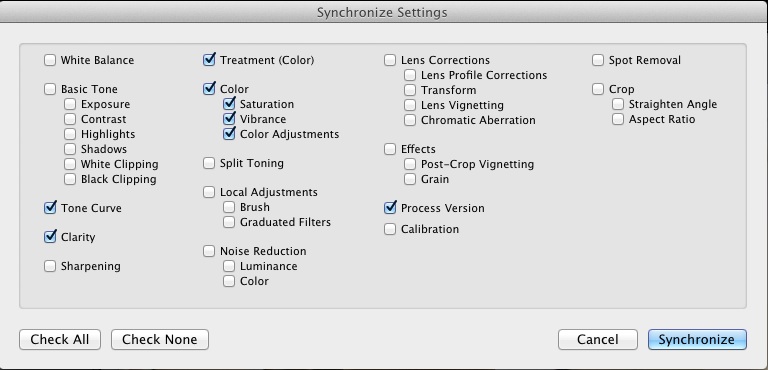
Okay, next step: you’ll see the menu below pop up:
This window will pop up; you’ll want to select the settings that you want to sync across the selection of photos. Some settings “sync well”, such as tone curves and sharpening, but others like exposure are kind of specific to each photo unless they are highly controlled.
Once this window pops up, you’ve got some choices to make. You’ll want to check or uncheck the boxes of what you want to sync across the photos. Some settings are “photo specific”, like exposure, so you usually will not sync those. But things like the tone curve and color settings are ideal to sync.
In my case, I synced all settings, and in just a few seconds, all of those wedding exit photos were polished perfectly.
Let’s talk about two ways that we can use this to fly through our workflows:
First of all, we can use sync settings as a general fix for our photos. If you’re shooting RAW images like me, they look only okay as they come out of camera. There are a few general tweaks that I make out of camera with every raw file. I adjust the tone curve, add contrast, and increase the black levels. Boom, those RAW files instantly look better.
Of course, it takes forever to make these adjustments to each and every photo. The best thing to do is apply it to one photo, and then sync settings. When the sync settings box pops up, I keep only the settings selected that I want to adjust. Adjustments like exposure are mostly on a photo by photo basis, so I don’t apply those to every photo.
Another scenario I can use this is in a little more advanced manner to do all of my editing for me. This is especially handy when editing weddings. As long as the photos are similar in terms of exposure and settings on the camera, I can usually sync all settings and edit multiple photos completely.
With sync settings, you aren’t just editing one photo: you can edit many photos at the same time. The power of this is really immeasurable, and it lets you do a lot of my editing work at speeds that others can’t match. If you’re looking to master one tool, spend some time working with syncing these settings and seeing what works for you.
Wrapping Up
By now, you should be super excited and thinking about how syncing settings is going to change your workflow. Whether you’re doing a general edit or using it to completely edit photos, you can really use it to your advantage with some creative planning. If you have questions about syncing settings, leave me a comment and I’ll be glad to help!
