Welcome back Lightroom fans! Today, I want to walk you through some of the “parts” of Lightroom that we’re going to spend a year talking about. Today, I’m showing off each section that you’ll see in every part of Lightroom. For each of the parts we’re looking at below, we’ll take a deeper look sometime soon, but this post is a great starting point for us.
The View
An overview of Lightroom.
You’ll see this default layout from when you first open Lightroom. The elements in this screenshot can be seen in almost every part of the program. The middle area with the photo you’re working on shows in the middle.
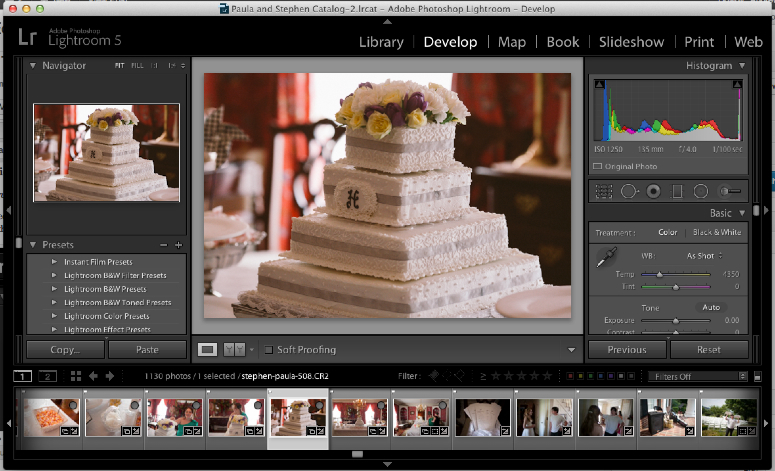
Oh boy, we’ll be getting used to seeing this a lot! This is a full look at a typical view of Lightroom. I’ll spend today showing around, and the rest of our time together learning to change it all.
The Filmstrip
Your photos, thumbnailed and previewed.
The filmstrip shows off the images that we’re working with in our catalog. As we move through it, we can click an image to have it displayed above. We can also use the keyboard and press the left and right arrows to move through our images.

The Lightroom filmstrip shows us the images that are in our catalog. As we move through them by clicking the images on it or pressing left and right on the keyboard, we choose different images, and they get displayed above the filmstrip.
Module Selector
Lightroom’s “mode changer.”
Modules are sections of Lightroom that let us work with our images in different ways. We can use the Web module to put images online, while the Print module is for printing hard copies of images. Throughout this blog, we’ll spend in-depth looks at each of the modules and what they can do, but for now, just know that you can use this list to switch modules.

Modules are different parts of Lightroom, that handle our images in different ways. For example, we use the Library module to organize and add data to our images that makes them searchable, while the Develop module is for editing the images and adjusting exposure and color.
The Navigator
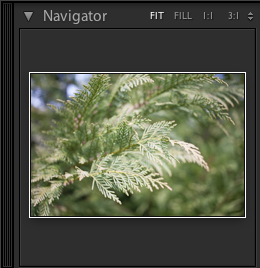
Your key to moving in the image.
The navigator allows us to move through our images and zoom in and out. You’ll find it most modules, and it’s a good look at a preview of the image we’re working with.
Panels
The parts that drive the power.
Each of these sections that are shown in this screenshot below are essential to the way that Lightroom works. These sections are called panels, and the panels shown below are the Histogram and Quick Develop panels. Lightroom panels change in each module, and impact images differently.
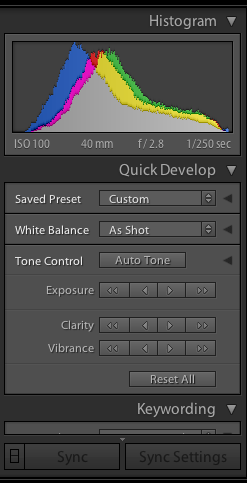
Panels like “Quick Develop” and the “Histogram” are exclusive the Library module. The Quick Develop panel is for tweaking the way the image appears, while the Histogram shows some technical data on our exposure.
Wrapping Up
Lightroom is a powerful program made up of many different parts, and understanding how they fit together lets us work through it efficiently! Today was just a quick look at the parts of the program, and it’s a good starting point for future explanations.