Hey again! Today, I’ve got a great tutorial on copying and pasting develop module edit settings. When we copy and paste our editing settings, we can take our exact edit from one image and transplant it on to another. This can help us speed up our editing process and make sure two images match. Let’s take a look at how easily and quickly we can do it.
This can be performed in the Develop module, and all it takes is two photos. We will start with one photo that’s already been edited, so go ahead and pick it out from the filmstrip.
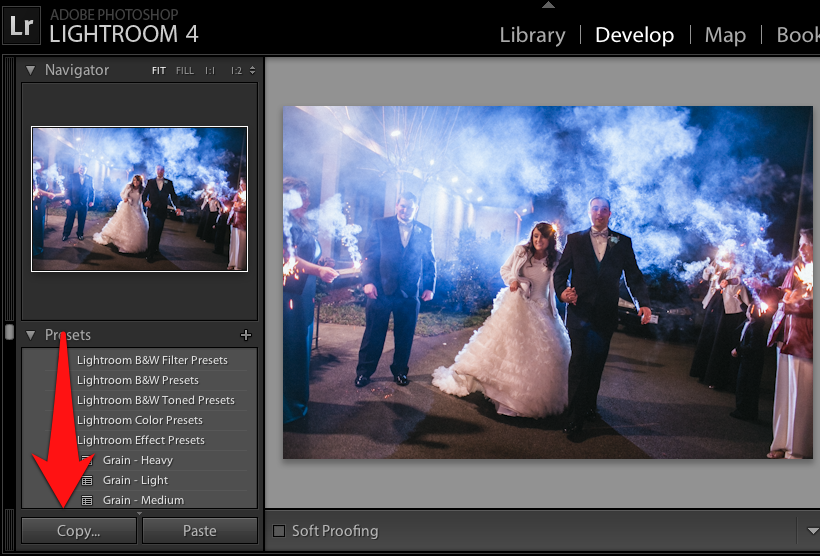
Once we have our image selected and up, just press the Copy button on the left side of the Develop module.

To copy and paste our editing settings, start by selecting a photo in the Develop module and press the “Copy” button on the lower left side of Lightroom.
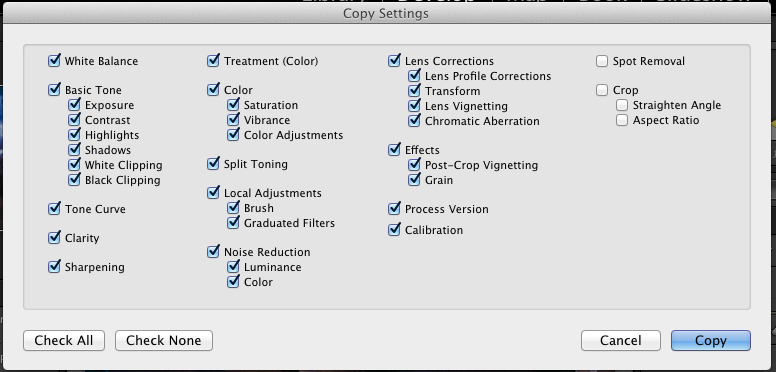
Once we press copy, we’ll be presented with a list of settings. Let’s check it out:

When the copy settings dialog pops up, you have a list of settings. Whatever settings you leave checked are the ones that will be copied from our edited image. You can selectively choose which settings will be copied, or press “Check All” to copy them all.
On the copy settings menu, we can select which settings we want to copy from our edit. You can be as selective as you wish and only copy settings like “Clarity” or “Treatment (Color)” to apply to our other image. In this way, you can be really selective in what part of the image’s edit you want to move to another image.
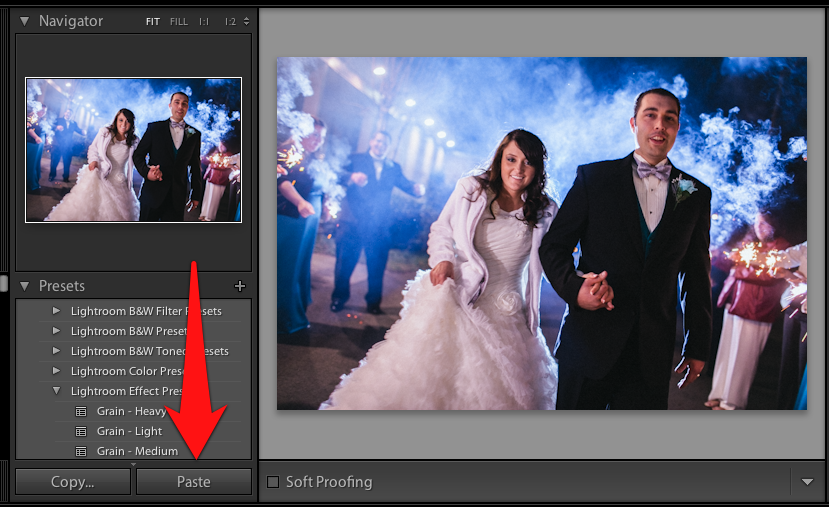
Next, go ahead and select the image you want to paste the settings onto. Simply press paste, and voila!

Pressing “Paste” will place all of our editing settings onto another image. You can see that because I copied almost all of the settings from the first photo, this photo looks very similar after applying the paste.
After the paste, you can see that our images are looking very similar! When we use this option, it’s usually best applied to similar images; otherwise copying and pasting the settings isn’t going to be very effective and may leave us with some funky edits.
Copying and pasting settings is one way to edit photos quickly. Are you using this or do you need more help with it? Leave a comment if you need help or have something to add!